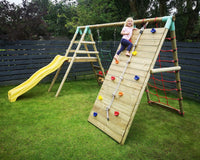
Step By Step Guide to Assemble Your Trampoline for Kids at Home - Trampolines have a unique place in the world of kid-friendly recreational activities. A trampoline is the best exercise for kids to keep them happy and excited without the phone. Have you ever considered installing a trampoline that can be used inside your home? Our step-by-step guide to assembling a trampoline for kids at home will take you through each step of the process, making it an enjoyable process for you and your kids.
Trampolines are great equipment for making exercise fun. It's tempting to start jumping immediately after receiving your trampoline delivery, but it's important to prioritize proper setup beforehand. Begin by carefully reading the included instructions and inspecting the components to assemble the trampoline. Before starting any assembly process make sure you have all the necessary components for proper setup. A safe and well-built trampoline is vital for anyone who wants to enjoy jumping and climbing to incredible heights.
Step By Step Guide to Assemble Your Titan Toys Trampoline for The Kids at Home
Assembling a trampoline at your home not only provides entertainment but also becomes an opportunity to spend time with your kids and family. Our detailed guide walks you through the process of setting up a trampoline for kids at home. The trampoline takes shape step by step. It turns a simple process into an intimate plan in which the emphasis is not on the work itself but on the harmonious rhythm and shared purpose.
-
Check the overall accessories of Trampoline
Starting the process of building a trampoline is a daunting task that begins with careful planning. The first step in this sophisticated assembly technique is to assemble all the necessary components. Imagine that you are in a busy workshop, surrounded by excitement and anticipation of joy.
Also, check - Best Trampolines for Toddlers & kids
A trampoline requires proper installation, which begins with connecting the components. Before starting, confirm the complete preparation, as the absence of even a single ingredient can stop the entire progress. Routine adjustments in the toolkit usually require tools such as a powerful drill, and head screwdriver.
-
Organize Trampoline Parts
Trampoline packages contain many components, both large and small. Sorting and assembling can be challenging if all the trampoline parts are in one pack. First, let's organize the parts of a trampoline and group them based on their use. Some pieces will be used in different places, regardless of their value.
-
Collect Your Equipment
Although setting up a trampoline doesn't require a lot of tools, having the necessary tools readily available can be beneficial. An adjustable spanner and a Phillips head screwdriver are essential tools for trampoline assembly. Many items will also include a screwdriver. The packaging also a spring puller, which you'll also need. When it comes time to install the springs, you should also have gloves.
Also, check How Your Kids Can Develop Core Strength Using Trampoline
-
Assemble Trampoline Frame
Arrange the components of the trampoline frame in a circle. Once the hoop is made, begin putting the legs of the trampoline together. Then, once you've got the round shape down, start connecting the trampoline legs together to the circle frame. There should be space reserved for the feet in the ring. If the trampoline feet are having trouble fitting into the holes, an easy fix is to tap them down a bit with a hammer.
-
Secure the Screws & Bolts
Begin by making sure all components are properly positioned before tightening the nuts and bolts to fasten them to the frame. Prioritize maintaining consistency throughout the process. After the fastening process is completed, it is recommended that all screws and nuts be thoroughly checked to ensure their secure connection. For added safety, consider enlisting the help of a partner to slowly turn the frame in the opposite direction. As a final step, carefully flip the trampoline frame over until it is firmly on its feet.
-
Setting up the Mat
Trampoline users often disagree on whether mats or springs should be installed first. Actually, they are all included in trampolines for a certain reason. Attach one spring side to a mat V-ring and the other spring side to the frame. After this tie the second spring in the same way in the opposite direction of the first spring.
-
Add Protection Pad
Users are protected from the impact of the spring by padded pads on the trampoline springs. Injuries from spring landing can be avoided by the foam padding, which also provides a soft touch. The protective pad can be attached to the frame using Velcro or straps. It also passes through the pillars of the cage.
Check out - Trampoline Games for Physical and Mental Development in Children
-
Add Trampoline Safety Net
Many trampolines have enclosure netting that acts as a barrier against falling out and provides protection against direct contact with the trampoline frame. So let's look at the basics of adding a trampoline safety net. The frame of an enclosure net is often made up of a few trampoline net poles. These poles easily fit into specific frame holes. Then with the help of a screwdriver, they are tied to the screw.
-
Add Trampoline Ladder
Ladders make it easy to enter and leave the trampoline. Trampoline stairs often have three or four steps. Ladders should be placed on the trampoline and secured with hooks. The anchor kit protects your trampoline from toppling over due to wind. This addition makes it easier to drive the trampoline into the ground. Simply bury the anchorage and secure it with an anchor kit.
-
Test the trampoline
Congratulations! You have assembled your kid's trampoline at home following our instructions. With a little time and effort, you can easily create a safe and enjoyable home environment that will make your kids happy.
Check out top benefits of trampolines for you & your kids.
Conclusion
Although the idea of installing a trampoline for kids in your home may sound daunting, using the right strategy can turn it into an enjoyable and memorable moment filled with joy and satisfaction. You can save money by taking on this project, but you can also spend special family time together and feel accomplished. By following these thorough instructions, you will not only build a trampoline but create happy memories as well. So spread your arms, read the instructions, and get ready to see the pure joy on your kids' faces.


